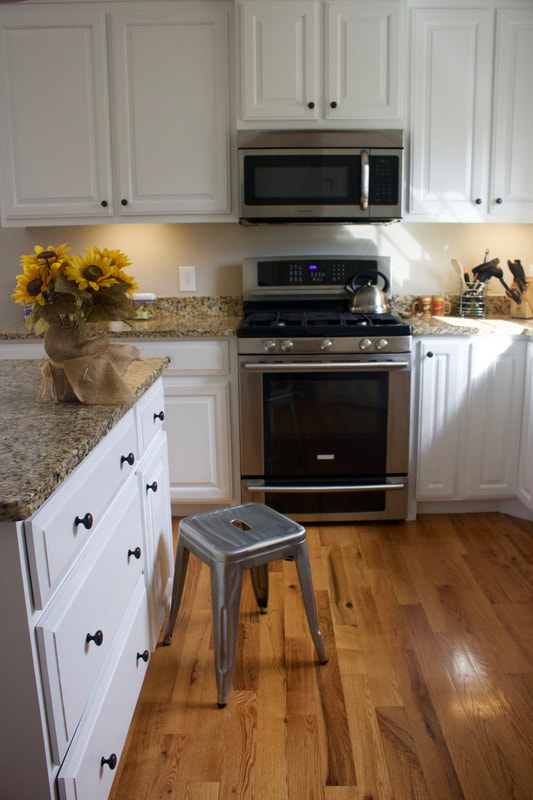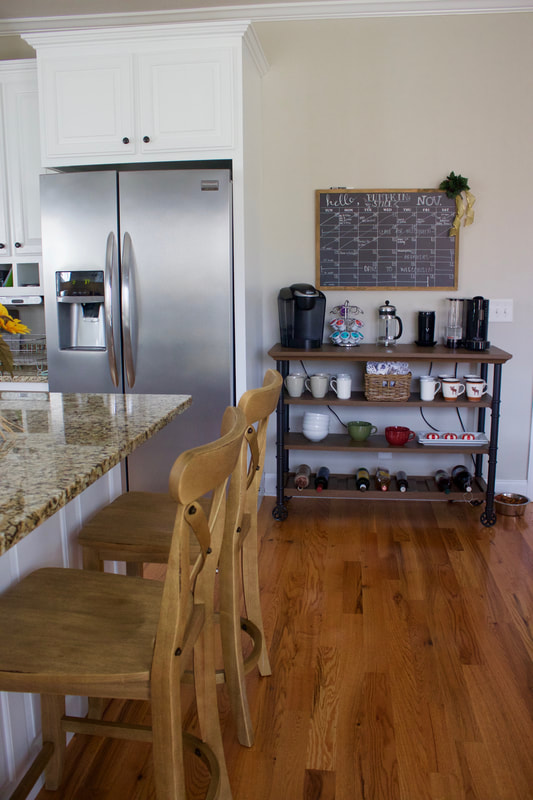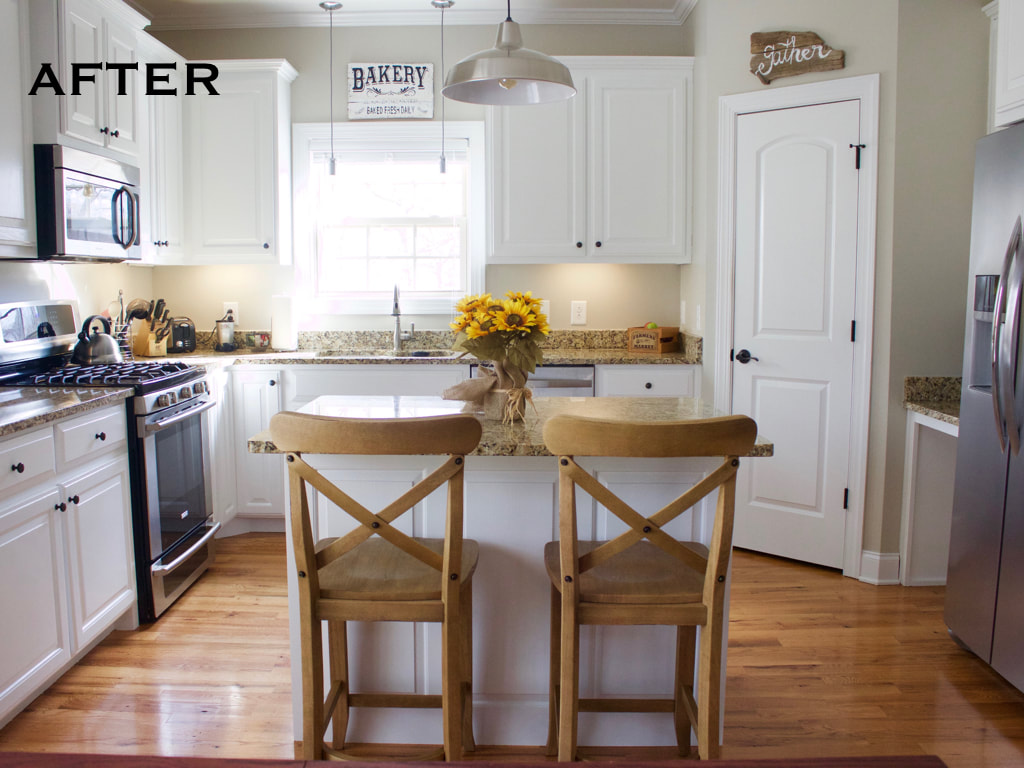 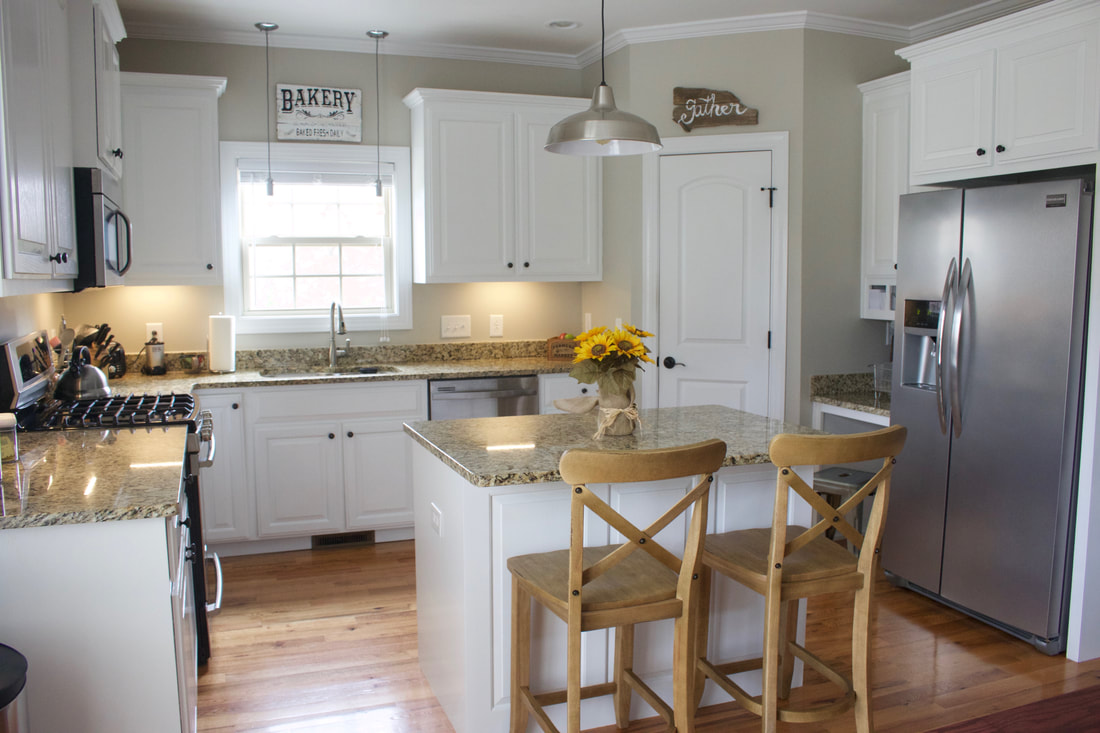 
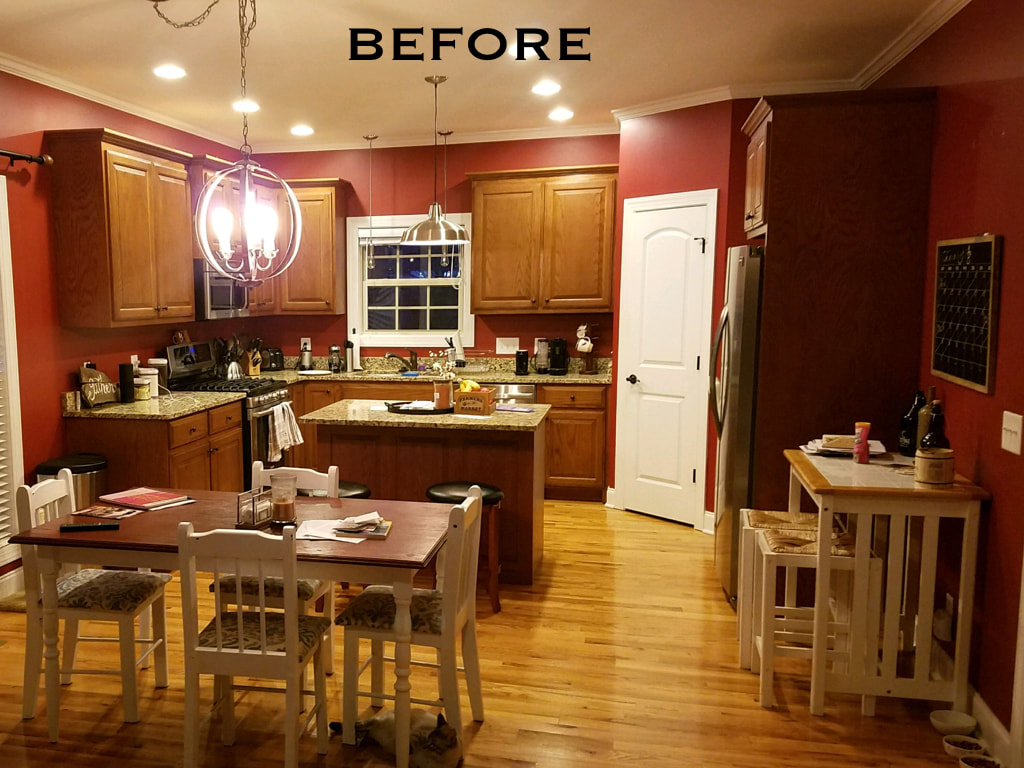
  The 'maternity leave nesting' has officially taken over my entire home. Not even kidding. We've touched 5 of the rooms in our house with a paintbrush in the last month. Though exhausting, it is equally as exciting to see everything coming together! I'm so thankful to have this time to be at home and use it for reflection, preparation & prayer. Being that this is our first child, I know this will be the last time period for the next 25 years that I will have time to myself with zero responsibility for another human. So I am soaking this up... but I obviously can’t sit still for too long! Hah! This is a mentally and physically grueling project to take on, but I say go for it because Eric and I were originally quoted $5,000 for someone to paint our kitchen cabinets for us. FIVE THOUSAND DOLLARS. I don’t know about you but there are a lot of other cool things I’d rather spend $5K on... especially when trying to save for a baby. There was an irrationally optimistic version of myself that woke up one day and thought — “Look. Eric's at work all day. Now that I'm at home, I'm going to be bored and I need a project. If someone else can paint these cabinets... So can I.” I would like to go back in time and slap that version of myself in the face... but I also would like to hug her. Because even though it was hellacious and hard work... it also turned out more beautiful than I ever imagined in my head! Want to guess how much it cost us for all of the products to do it ourselves? -- $250. Yeah. That’s it. ARE YOU KIDDING!? It’s a no brainer at that point. Just suck it up — and do it yourself, right?! Look, if I can do it 6 months pregnant... anyone can. Don't worry -- Eric helped me with all of the prep work of removing all of the cabinet doors, drawers and screws and laid them in our bonus room, as well as assembling everything back together when we were finished! All I had to do was come in with my brushes and go to work! I’ve been receiving a lotttt of questions as to what products we used to paint our oak kitchen cabinets from brown to white! I am NO professional by any means and do not claim for this to be the most efficient or proper way to do things. Honest to goodness we just watched several YouTube tutorial videos and checked with some friends about methods and products they used as well. Eric researched reviews on a ton of products and we just made sure to follow instructions closely to each product we used! After all of the research was finished, we headed to Lowe's and bought the following things to get the job done (I've also included links with everything below in case you need visuals like I do!): What you'll need to buy: - Painters Tape (This is my favorite kind of painters tape to use) - 1 bottle of Sander/Deglosser (this takes the place of your sanding, simply put some on a rag and wipe down the front and backs of each cabinet door, drawer and the "box frame" connected to the wall) - 1 gallon of KILZ Primer (Do one coat - provides nice coverage before your actual paint is applied) - 2 gallons of Valspar Cabinet Enamel (We did 4 coats - Make sure you purchase the one with semi gloss. How many gallons of paint you will use will depend on how many cabinets you have. I would start with purchasing 1 gallon first and then see if you need more. We have 21 cabinet doors & 7 drawers as well as an island for a rough guesstimate) - 8 packs of Painters Tripods (allows you to elevate cabinet doors off of the ground when painting them. These come in a 10 pack so based on how many cabinets you have will dictate how many packs you will need to purchase, calculating that you will need 4 for each cabinet door. There were some small doors I just balanced with 3 each.) - 2 edging brushes (I suggest purchasing one large and one small that way you can cover a lot of surface area when you need to, but also get the tiny nooks and crannies. Make sure they are polyester/nylon blend) - 6 inch foam roller (make sure you get the ones that specify they are for cabinet doors as well as buying a few extra foams as you won't finish this with just one foam!) - Bumper pads - (these will be re-applied once you've finished painting and it's cured that way your cabinets don't slam as you open and close them) Additional tips & info: I suggest taking a shop vac or something with extreme suction on it and deep cleaning/vacuuming along the base of the cabinet box frames/trim that will be receiving paint. It's very important that when you mask the tape, that it adheres and there's no dirt or animal dander standing between you and the floor. Or else your paint will find a way to seep through. Be sure to remove all of the bumper pads on each cabinet door before applying any deglosser, prime, or paint. We allowed 24 hours for everything to cure before assembling everything back together. It honestly will take this paint about a week or so to COMPLETELY cure and not be so fragile so be very, very careful the first week when opening and closing them. I learned that if you just let the brushes and foam rollers sit out for even two hours between coats, they get very stiff and almost unmanageable to work with. To avoid this, wrap them tightly with seran wrap so it holds the moisture of the paint in, this makes life wayyyyyy easier. As for the dry times on EACH product, I would honestly go by the instructions as closely as your schedule allows to make certain that your paint is curing between coats. For the Valspar paint specifically, we did wait the entire suggested 8 hours between dry times. So I would begin my first coat of the day on all of the cabinets at 8:00am each morning, that way I could come back for a second coat in the same day around 4/5. While the first coat of the day was drying on the cabinets, I would come through the main part of the kitchen and do my one coat over the box frames, island, and drawers. It will take you a day or so to find your rhythm and what works best for you -- I personally needed more rest time for my back with me having to bend, twist and contort in such awkward positions. Duh, because I'm pregnant. So maybe you won't need as much down time and you can knock it out faster! As far as full days spent on this project -- it only took 7 work days to complete! Good luck to anyone that decides to brave it! Like I said, it is hard, hard work and once you've started there's no turning back! Haha! Again, it is so worth it! If anyone has any specific questions about things I didn't touch on, DEFINITELY reach out to me and I would be happy to answer any concerns you might have! - xx Katie
0 Comments
Leave a Reply. |